




Using a lifting clutch safely in precast concrete operations requires following the right sequence every time. If you're operating these devices in your plant, you need to know the pre-use inspection points, proper engagement steps, and mandatory test procedures before lifting any element. This guide walks you through the complete process from checking your clutch and anchor to final disengagement after setting down panels. You'll learn the visual confirmation checks that prevent accidental release, the load calculations that keep lifts within safe limits, and the common operator mistakes that compromise safety.
What Is a Lifting Clutch
Before you connect your lifting equipment, you need to understand how a lifting clutch transfers and releases the load from a precast concrete element.
Basic Definition
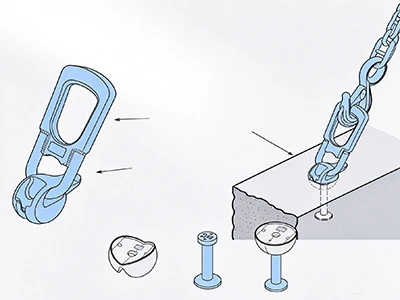
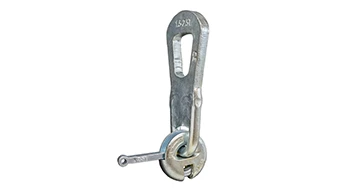
A lifting clutch is a removable connection device used with a compatible cast-in or post-installed lifting anchor. It helps connect the anchor to approved lifting equipment during the handling and positioning of precast elements.
Main Components
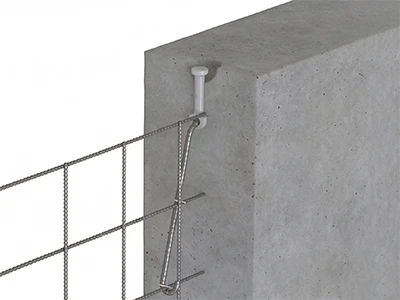
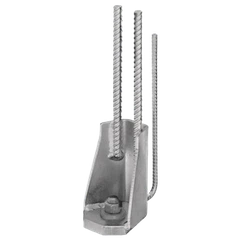
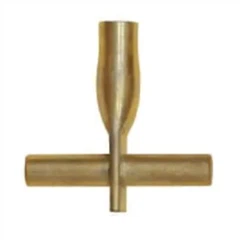
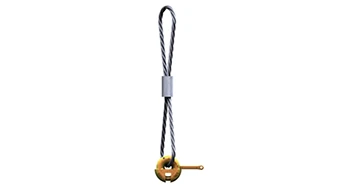
A typical precast lifting connection includes the embedded lifting anchor, lifting clutch, wire rope sling or webbing sling, and the crane hook with suitable connectors. Each component must match the approved lifting plan.
How It Works
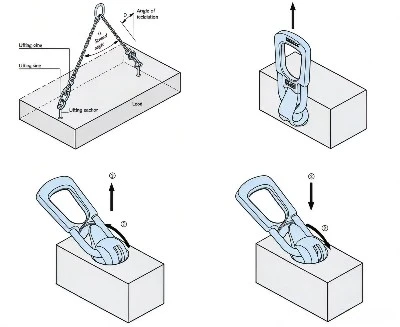
When you connect the clutch to its matching anchor and attach the required lifting equipment, it transfers the load from the crane rigging to the anchor. After positioning the element on stable supports, you remove the residual sling tension and release the clutch according to the manufacturer's instructions.
What to Check Before Using a Lifting Clutch
Before you connect a lifting clutch to a precast concrete element, check the complete lifting system and confirm that your planned lift can be performed safely.
Check Component Compatibility
Ensure that the clutch and anchor form a compatible system with matching connection dimensions and operating requirements. Do not combine components simply because their threads or appearance look similar.
Check the Rated Capacity
Confirm that the clutch, anchor, sling, shackle, lifting equipment, and concrete element are suitable for the planned load. The complete lifting system is limited by its weakest component.
Inspect the Anchor and Clutch
Check the anchor, surrounding concrete, clutch body, connection thread, and release mechanism for damage, wear, corrosion, looseness, or cement buildup.
Confirm the Lifting Plan
Follow the approved lifting plan and verify the element weight, lifting points, center of gravity, rigging arrangement, site conditions, and exclusion zone.
Know Your Lifting Clutch Type
Different clutch designs require slightly different engagement methods, so identify your type before operating.
Lifting Clutch
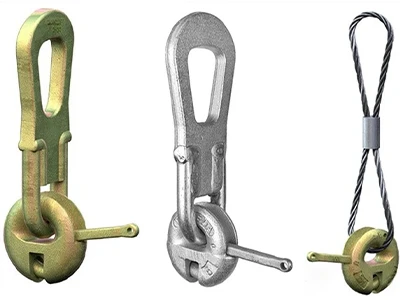
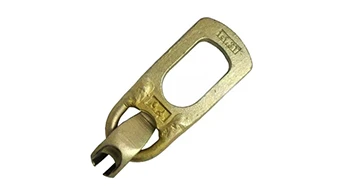
The GME Lifting Clutch uses a manual lever to lock onto spherical head anchors. You push the lever down to engage and lift to release. It provides 360-degree rotation for panel positioning.
Ring Clutch
Ring clutches feature a shackle and locking bolt design. They work with flat lifting systems for large thin elements like slabs and floor panels where standard clutches don't fit.
Cape Ring Clutch
Cape ring clutches are designed for edge lifting applications on precast panels. The ring design allows quick attachment to edge anchors, making them ideal for wall panel demoulding and rotation operations.
How to Use a Lifting Clutch Step by Step
Follow this eight-step sequence every time you lift a precast element to maintain safe operations and prevent equipment failure.
Step 1: Prepare the Lifting Area
Clear the lifting zone of obstacles and mark exclusion boundaries. Check overhead clearances and confirm the ground can support your crane's outriggers. Brief your crew on hand signals and assign a signalman if the operator's view is blocked.
Step 2: Inspect All Lifting Components
Examine your lifting clutch for cracks, deformation, or worn engagement surfaces. Check that the lever moves freely and the locking mechanism works. Inspect the cast-in anchor for damage and verify no concrete cracks surround it. Confirm the Working Load Limits on both clutch and anchor exceed your element's calculated weight.
Step 3: Connect the Lifting Clutch to the Anchor
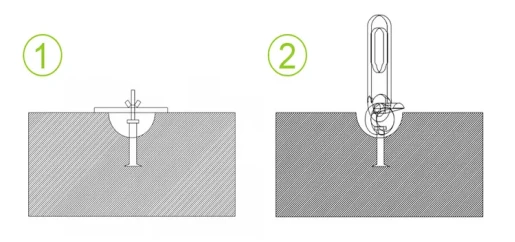
Hold the clutch by its bail and position it directly above the anchor. Lower the clutch vertically so the T-slot aligns with the anchor head. You should feel it seat into place; forcing it means something's misaligned. Push the lever down firmly until it locks completely. Visually confirm the lever is fully engaged with no gaps.
Step 4: Attach the Lifting Equipment
Connect your crane hook or sling to the clutch bail. Check the connection is secure and the rigging sits centered on the bail. Verify all shackles are properly tightened, and safety pins are in place.
Step 5: Take Up the Load Gradually
Signal the crane operator to slowly remove slack from the rigging. Watch the clutch as tension increases. Stop immediately if you see any slippage or hear unusual sounds.
Step 6: Perform a Test Lift
Lift the element 100-150 mm off its supports and hold for 15 seconds. Check that the clutch remains securely engaged and the element hangs balanced. If anything looks wrong, lower immediately and investigate.
Step 7: Lift, Transport, and Set the Element
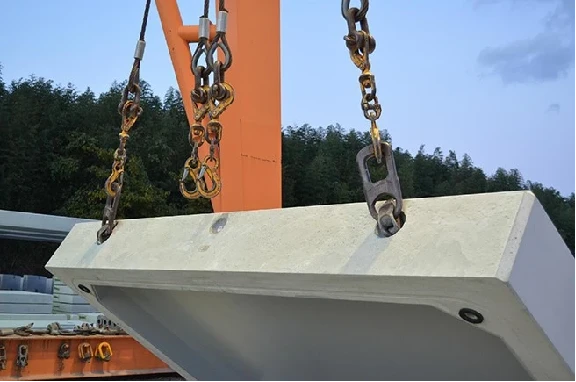
Lift at a steady speed; avoid jerking movements. Keep personnel outside the exclusion zone throughout the lift. Position the element over its final location and lower it slowly onto supports until the weight fully transfers off the clutch.
Step 8: Release and Remove the Lifting Clutch
Verify the crane has released all tension and the element sits stable on its supports. Lift the lever to unlock the clutch and remove it vertically off the anchor. Wipe off any concrete residue before storing.
Safe Lifting Angles and Rigging Considerations
Before you lift a precast concrete element, keep the rigging arrangement consistent with the approved lifting plan. Use designed lifting points and keep the lifting clutch, anchor, and slings within their specified limits. Avoid side or angled loads unless the system and plan allow them. Check sling condition, connection security, and load distribution before taking up the load. Tag lines may help control rotation, but they should not correct unsafe rigging. Stop the operation if the element moves unevenly or any connection behaves abnormally.
Conclusion
When you use a lifting clutch for precast concrete, always check compatibility, inspect the anchor, clutch, and rigging, and follow the approved lifting plan. Apply the load gradually, perform a controlled test lift, and stop if the element moves unevenly. Once it is fully supported, unload the equipment and release the clutch safely. For compatible precast concrete lifting solutions and application support, contact GME to discuss your anchor system, load requirements, and production needs, and help you select reliable equipment for efficient and safe precast element handling in your factory.
FAQ
Q: How Do I Know if a Lifting Clutch Is Engaged Properly?
A: Check the model-specific locking indicator and ensure the clutch is fully seated. Confirm that the anchor, clutch, and lifting equipment are correctly aligned, then perform a controlled test lift.
Q: Can I Use a Lifting Clutch at an Angle?
A: Only within the approved lifting plan and the manufacturer's limits. Angled loads increase forces on the anchor, clutch, and rigging, so stop if the connection is not designed for the angle used.
Q: How Often Should Lifting Clutches Be Inspected?
A: Inspect the clutch, anchor, thread, release mechanism, and surrounding concrete before every use. Additional inspections are required after damage, unusual loading, or service according to project requirements.
Q: What's the Difference Between a Lifting Clutch and a Ring Clutch?
A: A ring clutch is a specific quick-release type with a ring-shaped connection. "Lifting clutch" is the broader term and may include manual-release, quick-release, or captive designs.
Q: Can I Repair a Damaged Lifting Clutch?
A: Do not repair or modify a damaged lifting clutch yourself. Remove it from service and have it inspected by the manufacturer or a qualified specialist, following their replacement criteria.