


Introduction
Template magnets theoretically offer impressive attraction, but in actual prefabrication production, proper installation is crucial to their performance. I've seen magnets rated for 1800 kg slip off simply due to poor surface contact or incorrect spacing. Have you encountered this?
In this step-by-step guide to template magnet installation, we'll use factory-proven, practical methods to explain the entire process from surface preparation to removal. If you want stable, clean edges and fewer production mishaps, proper installation is the starting point.
Understand How Shuttering Magnets Work Before Installation

Basic Working Principle of Shuttering Magnets
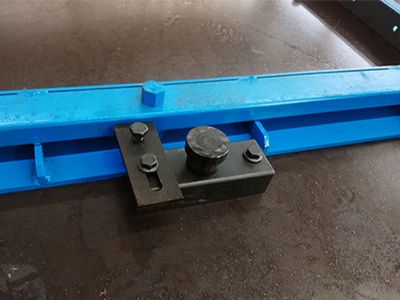
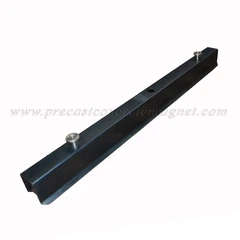
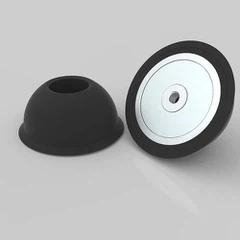
The shuttering magnet uses a high-strength permanent magnet encapsulated in a steel housing and features a switch. Once activated, the magnetic force pulls directly towards the steel casting surface, securing the shuttering magnet in place through pure magnetic force. No bolts, welds, or mechanical locks are needed; the attraction depends entirely on magnetic contact and alignment.
Why Direct Steel-to-Steel Contact is Crucial
The template magnet is designed for optimal performance when the magnet base is in direct, complete contact with the steel surface. Any contaminants, such as concrete residue, rust, paint buildup, or unevenness, act as a buffer. Unlike bolted systems, magnets cannot "penetrate" obstacles. Poor contact immediately reduces attraction.
How Air Gaps Reduce Actual Attraction
Even small air gaps can have a significant impact. A gap of just 1-2 millimeters can significantly reduce effective attraction. This is why a magnet rated for 1800 kg may perform far less effectively in the field than expected. Vibration can cause air gaps to widen, leading to creep or displacement of the shuttering magnet. Cleaning the surface of the mold platform plays a very important role.
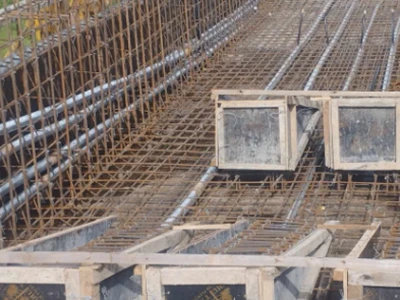
Prepare the Formwork Surface Properly
Remove Concrete Residue, Rust, Oil, And Debris
Any foreign material between the magnet and the steel bed creates an "air gap," and air gaps are the enemy of magnetic holding force. Even a thin layer of dried cement paste, rust scale, or oil film can significantly reduce real holding strength. This often leads to slight side-form movement during vibration, alignment drift, and ultimately dimensional deviations, edge defects, or even rework.
It is recommended to make bed cleaning a standard task for every shift: first remove hardened concrete residue, then clean rust using a wire brush or grinder, and finally remove oil with a degreasing agent. The goal is to ensure that the magnet base contacts are clean, exposed, and solid steel.
Pay Close Attention To Flatness And Surface Condition
Shuttering magnets are designed to achieve full contact on flat steel surfaces. Dents, weld spatter, splashes, localized depressions, excessive paint buildup, or even slight bed warping can prevent proper contact and lead to unstable holding force. Compared with a smooth, flat bed, an uneven surface not only reduces effective holding strength far more than most operators expect, but also causes point contact or slight rocking of the magnet. This instability is easily amplified during vibration, showing up as local side-form movement, widened joints, increased grout leakage, and reduced dimensional consistency and surface appearance of the finished panel.
Perform Simple Surface Checks Before Placing Magnets
Visual inspection is only the minimum requirement. A more effective approach is to place a straightedge or steel ruler across the bed to quickly identify high or low spots, and use a scraper to check for loose scale or thin layers of residual paste. If necessary, run a hand over the surface to detect any slippery oil film. After positioning the magnet, take a final look to confirm that the base sits naturally flat, without lifted edges or visible gaps. If a magnet cannot sit flat before activation, it will not perform reliably after activation, and repeated use will accelerate wear and shorten service life. Getting this step right is often more effective than simply switching to a magnet with higher rated pull force.
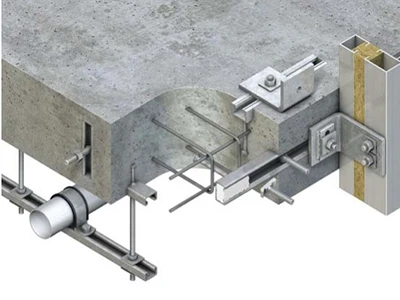
Place Shuttering Magnets in the Correct Location

Recommended Magnet Spacing Based on Side Formwork Height
Magnet spacing should increase with the height of the side formwork. Lower side forms can withstand larger magnet spacing, while higher side forms generate greater concrete pressure, thus requiring magnets to be placed more closely. Too few magnets will not withstand the pressure and will instead overload the weakest point, leading to slippage.
Keep Magnets Perpendicular to Formwork
Magnets must be perpendicular to the side formwork or adapter and fit tightly. Tilting or offset placement reduces the effective contact area and causes uneven stress. This often occurs during vibration, where even if the magnets are theoretically strong enough, the formwork may suddenly shift.
Use Adapters or Brackets When Necessary
When the side formwork and magnet housing are not directly compatible, a shuttering magnet adapter or bracket is essential. A suitable adapter ensures that force is transferred directly to the formwork, rather than bending or twisting the magnet body.
Activate the Shuttering Magnet Properly
Use The Correct Activation Tool
Always activate the shuttering magnet with the designated lever or release tool. Improvised tools or manual pressing usually cannot apply sufficient force. The correct tool ensures that the internal magnetic core is fully driven downward and makes tight contact with the steel surface, which is essential for achieving the magnet's effective holding force.
Ensure Full Engagement Of The Magnetic Core
The magnet must be fully engaged, not partially pressed. A half-engaged core creates an air gap between the magnet and the formwork, significantly reducing holding strength. In production, this often determines whether the side form remains stable or shifts during vibration.
Perform Visual And Tactile Checks After Activation
After activation, visually confirm that the activation pin or button is fully depressed and flush. Then apply light pressure to the side form to make sure there is no movement. This simple check takes only a few seconds but can prevent hours of rework later.
Common Shuttering Magnet Installation Mistakes to Avoid
The first mistake is placing magnets on dirty, rusty, greasy, or uneven formwork. Even a thin layer of residue can create air gaps, which silently reduce the "rated attraction" to a lower level of actual attraction.
The second problem is incorrect spacing, especially on higher side forms or thin, flexible profiles. Too few magnets cannot withstand the pressure of fresh concrete, while improper spacing creates weak points at the joints, leading to bending or cracking.
Another common problem is ignoring the vibrations during pouring. Vibrations not only compact the concrete but also create repeated lateral movement. If the magnets are not fully engaged or adequately supported, this movement can cause the side formwork to gradually shift.
Conclusion
Correct shuttering magnet installation isn't complicated, but it demands discipline at every step. Clean surfaces, proper spacing, full activation, and routine checks make the difference between stable formwork and costly rework. When installation becomes a standard process not a shortcut-magnet performance becomes predictable and reliable.