


Introduction
Installing precast concrete steps may seem simple, but proper foundation preparation is crucial. I've seen well-made steps crack or tilt simply because the ground wasn't compacted enough. Building reports indicate that inadequate foundation preparation is one of the leading causes of premature staircase failure.
Precast concrete steps are widely used in residential entrances, commercial buildings, and modular construction due to their durability, factory prefabrication, and quick installation. However, while strength is important, proper installation is key to ensuring safety, stability, and long-term performance.

What is a Precast Concrete Step
Precast concrete steps are factory-produced reinforced concrete stair units that can be transported directly to the construction site for installation. Unlike cast-in-place steps, which are poured and cured on-site, precast steps are produced in a controlled environment, ensuring consistent strength, dimensional accuracy, and a smooth surface. This controlled production process reduces weather-related delays and minimizes on-site construction.
Precast concrete steps are commonly used in residential entrances, commercial buildings, schools, and modular construction. They are designed to withstand heavy loads, resist freeze-thaw cycles, and maintain structural integrity over the long term.
Their main advantages lie in their durability and efficiency. The combination of structural reliability and a simplified installation process makes precast steps ideal for projects requiring long-term performance and consistent quality.
Precast Concrete Steps vs Cast-in-Place Concrete Steps
|
Comparison Factor |
Precast Concrete Steps |
Cast-in-Place Concrete Steps |
|
Manufacturing Method |
Factory-produced in controlled conditions |
Poured and cured directly on site |
|
Installation Time |
Fast installation, ready to place |
Slower due to forming and curing time |
|
Weather Impact |
Minimal weather impact during production |
Highly affected by temperature and rain |
|
Quality Control |
Consistent strength and surface finish |
Depends on the site's workmanship |
|
Concrete Strength |
Uniform curing ensures reliable performance |
May vary due to site conditions |
|
Structural Reliability |
Engineered and reinforced for load capacity |
Reinforcement depends on on-site accuracy |
|
Labor Requirement |
Lower on-site labor requires lifting equipment |
Higher labor costs for forming and finishing |
|
Surface Finish |
Smooth, factory-molded finish |
Finish quality varies |
|
Curing Before Use |
Ready for use immediately after placement |
Requires curing time before full load |
|
Project Scheduling |
Predictable and efficient schedule |
The schedule may be delayed |
|
Design Flexibility |
Standardized sizes |
More flexible custom shaping |
|
Best Application |
Residential entrances, modular projects |
Custom shapes, small-scale builds |
Tools and Materials Required
Measuring Tape And Level For Alignment
Accurate measurement is the foundation of a stable installation. A reliable measuring tape ensures the precast concrete step aligns correctly with the doorway height and landing area. Even small measurement errors can create uneven risers or unsafe step heights. Pair it with a quality spirit level to confirm horizontal alignment from front to back and side to side. Precision at this stage prevents costly adjustments later.
Tape Measure And Spirit Level For Precise Alignment
While often mentioned together, both tools serve different roles. The tape measure determines placement and spacing, while the spirit level verifies flatness and structural balance. A step that looks level may not be structurally level. Taking time to double-check alignment improves long-term stability and prevents shifting or rocking.
Shovel And Excavation Tools
Proper excavation is critical. A shovel, spade, or small digging tools help remove loose soil, organic matter, and debris from the installation area. Digging to the correct depth allows room for a compacted gravel base. Skipping this step often leads to uneven settlement over time.
Crushed Stone Or Gravel Base Material
A well-compacted gravel base provides structural support and drainage. Crushed stone interlocks tightly, distributing weight evenly and reducing the risk of movement. Compared to plain soil, gravel significantly improves long-term performance.
Sand For The Leveling Layer
A thin layer of sand over the compacted gravel allows for fine adjustments. It helps achieve precise leveling and full surface contact between the precast step and the base.
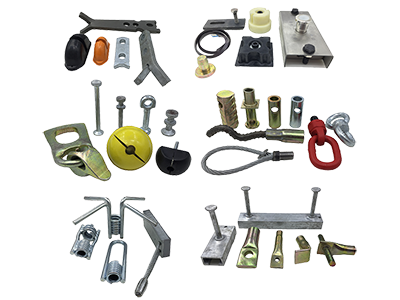
Lifting Equipment For Heavy Precast Units
Precast concrete steps can be very heavy, so it is necessary to prepare lifting equipment in advance, such as lifting clutches and pre-embed lifting anchors. Using mechanical lifting equipment such as small excavators or cranes can ensure safe placement and prevent damage or personal injury.
Safety Gloves And Protective Footwear
Heavy materials demand proper protection. Durable gloves and steel-toe boots reduce the risk of injury during handling and positioning, ensuring a safe and controlled installation process.

Site Preparation and Excavation
Choosing the right site determines the stability of precast concrete steps over many years. Even sturdy steps built on soft ground will inevitably fail.
First, measure the doorway height and calculate the final elevation of the steps. The top of the steps should align naturally with the threshold for easy passage and to prevent tripping. Clearly mark the outline of the steps on the ground to define the excavation area.
Excavate to the required depth, leaving space for a gravel base course and leveling layer. Remove all loose soil, tree roots, and organic matter. Soft or uncompacted soil will compress under load, leading to uneven settlement over time.
Assess drainage. The base course should slope slightly outwards to prevent water accumulation. Water accumulation weakens the soil structure and accelerates long-term settlement.
After excavation, compact the exposed soil before adding the base course material. Initial compaction improves load distribution and reduces subsequent displacement. The excavated surface should be flat, stable, and slightly larger than the steps themselves to allow for proper alignment adjustments during installation.
Building a Stable Base Foundation
The strength of precast concrete steps depends on the foundation beneath them. No matter how well-made the steps are, if the foundation is inadequate, it will eventually lead to settlement, tilting, or cracking. While the foundation isn't the most visible part of the project, it determines everything.
The first step is excavation. Remove all loose soil, organic matter, and debris until a solid, undisturbed surface is exposed. If soft soil remains in place, the steps may shift over time. The excavation depth should be sufficient to accommodate a compacted gravel base and a leveling layer.
Next is the gravel or crushed stone base. This layer distributes weight evenly and improves drainage. For most residential installations, a 4-6 inch thick compacted gravel base is sufficient. In softer soils, increasing the thickness can provide additional stability. The gravel should be laid in layers, not all at once. Thoroughly compact each layer using a hand tamper or plate tamper to eliminate air pockets.
After the gravel is compacted, lay a thin layer of sand to create a smooth, level surface. Sand allows for easy fine-tuning and ensures a perfect fit between the steps and the base. Before installing precast components, use a level to check the surface's levelness from all sides.
Securing and Backfilling
After the precast concrete steps are in place and fully leveled, securing and backfilling become the final steps determining their long-term stability. This stage is often underestimated, but it plays a crucial role in preventing step movement and uneven settlement.
Inspect the contact between the bottom of the step and the prepared foundation. Ensure the support is adequate and even, with no visible gaps. If minor voids exist, adjust the leveling layer before proceeding. Stability begins at the bottom.
Begin backfilling around the precast steps using suitable soil or granular material. The filler should be added gradually in layers, rather than dumped all at once. Each layer should be compacted to eliminate air pockets and reduce the risk of future displacement.

Conclusion
Installing precast concrete steps is not complicated, but precision is crucial. A solid foundation, proper leveling, and adequate drainage determine whether the steps will remain stable for decades or shift within a single season. With meticulous site preparation and structural alignment, precast concrete steps offer long-term durability, structural safety, and an aesthetically pleasing appearance. Taking the time to prepare thoroughly ensures a stable, professional installation that operates reliably year after year.
FAQ
Q: Can I install precast concrete steps myself?
A: Yes, small precast concrete steps can be installed by oneself if you have foundation construction experience. However, heavier components require hoisting equipment and multiple people working together. For large or multi-tiered steps, it is recommended to hire professional installers to ensure safe and accurate installation.
Q: How thick should the crushed stone base layer under precast concrete steps be?
A: In residential projects, a base layer thickness of 100–150 mm is generally recommended. In soft soil foundations or with heavy loads, a thicker and more thoroughly compacted base layer is required to prevent settlement.
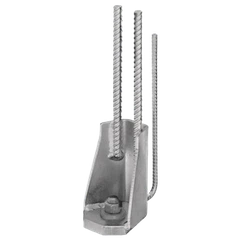
Q: Do precast concrete steps need anchoring?
A: In most residential projects, if the base layer is properly compacted, additional anchoring is generally not required. However, in commercial or high-traffic environments, proper anchoring can improve long-term stability and safety.
Q: How can I ensure the steps remain level long-term?
A: The key is in the foundation construction. A compacted crushed stone base layer, a proper drainage slope, and sufficient contact at the bottom will prevent displacement. Regular checks are recommended after seasonal changes.
Q: Can I place precast steps directly on the soil?
A: No. Placing precast concrete steps directly on soil can easily lead to uneven settlement and instability. A compacted crushed stone base must be used to ensure long-term structural stability.
Q: How heavy are precast concrete steps?
A: Weight varies depending on size and design. Small residential steps can weigh hundreds of pounds, while large multi-tiered components can exceed one ton. It is essential to confirm the weight before installation and plan hoisting accordingly.
Q: How long does it take to install precast concrete steps?
A: With adequate preparation, installation is usually completed within a few hours. However, site excavation and base preparation time will vary depending on site conditions.
Q: What causes cracking after precast concrete steps are installed?
A: Cracking is usually caused by improper base preparation, uneven settlement, or insufficient drainage, and rarely by manufacturing issues. Proper installation can significantly reduce the risk.