


Introduction
The edge quality of precast concrete slabs directly determines the installation precision of the components, their structural load-transfer performance, and their aesthetic integrity. Achieving a flawless edge requires the avoidance of common defects-such as chipped corners, grout leakage, flatness deviations, and poor joint alignment. Creating such a perfect edge depends on far more than just the concrete mix design; it relies critically on the precision of the formwork, the appropriate selection of chamfers, the stability of magnetic fixing devices, and strict adherence to proper procedures during the demolding process. When all these elements work in synergy, the result is a finished product characterized by clean, fluid lines, significantly reduced rework, and substantially enhanced production efficiency.

Why Edge Quality Matters in Precast Concrete Panels
Ensuring Structural Safety and Mitigating Hazards
The edges of precast concrete slabs constitute their structurally weakest zones; yet, they are required to fulfill critical functions such as load transfer at joints, impact resistance, and crack control. Should the edges exhibit defects, such as chipped corners, cracks, or insufficient compaction, stress concentrations will occur. This compromises the component's shear and flexural strength, making it susceptible to progressive edge deterioration over time. In severe cases, such defects can undermine the structural stability of the entire precast unit, potentially leading to safety incidents, such as loosening or structural collapse following installation.
Ensuring Installation Precision and Construction Quality
Precast concrete slabs rely on edge-to-edge splicing to achieve overall assembly; consequently, the flatness of the edges, their dimensional tolerances, and their jointing configurations (e.g., tongue-and-groove or recessed joints) directly dictate installation precision. Uneven edges or excessive dimensional deviations result in irregular joint gaps and poor interlocking, preventing subsequent grouting from achieving adequate compaction. This renders the components prone to loosening and displacement. Furthermore, chipped corners or edge defects at the joints lead to uneven stress distribution, causing component misalignment post-installation and compromising the overall structural integrity of the entire assembly system.
Enhancing Service Performance and Preventing Future Deterioration
The quality of the edges directly governs the component's resistance to water ingress, permeability, and corrosion. If the edges harbor defects, such as gaps, honeycombing, or voids caused by grout leakage, rainwater, and corrosive agents can easily infiltrate the interior of the component. This leads to concrete carbonation and steel reinforcement corrosion, which in turn triggers cracking and structural damage, ultimately impairing the component's functional performance.
Common Causes of Poor Edges in Precast Panels
Inaccurate Formwork Alignment
Even minor deviations in formwork positioning can lead to uneven edges or irregular shapes. When the molds are not precisely aligned, the concrete will reflect these imperfections, resulting in precast panels that require additional finishing or correction.
Weak Fixation Leading to Movement
If the formwork is not securely fixed, slight movement during concrete pouring or vibration can cause edge deformation. Compared to rigid fixing systems, unstable setups often result in inconsistent product quality. Using reliable fixing methods, such as magnetic systems, helps maintain formwork stability throughout the casting process.
Poor Concrete Flow and Insufficient Vibration
If concrete does not flow properly into edge areas, it may create voids or rough surfaces along the edges. Inadequate or uneven vibration can trap air, especially at corners and edges, negatively affecting both appearance and structural quality.
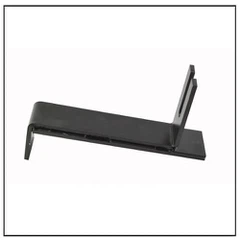
Damaged or Worn Chamfer Strips
Chamfer strips define the edge profile. When they are worn, cracked, or misaligned, the resulting edges lose their sharpness and consistency, which impacts the overall quality of the precast panel.
Improper Demolding Techniques
Premature demolding or insufficient lifting support can lead to edge chipping or damage. Controlled and well-planned demolding processes ensure that edges remain intact and clearly defined.
Refined Management of Production Processes
The production process lies at the core of edge molding; therefore, critical attention must be paid to four key stages: formwork, pouring, vibration, and curing, in order to prevent defects such as chipped edges and corners, grout leakage, and surface honeycombing or pitting.
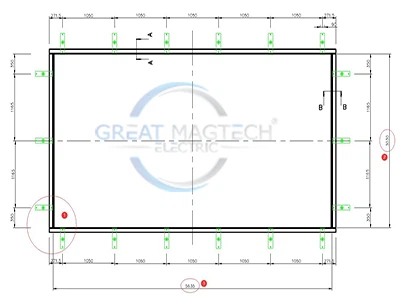
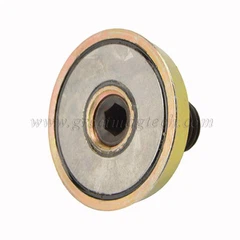
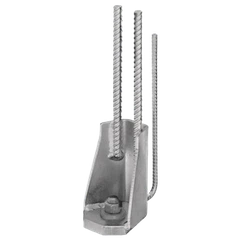
Regarding formwork control, priority is given to using 6mm-thick Q235B steel plates or 8mm-thick aluminum alloy panels. Corner sections are integrally stamped and formed, ensuring that splice joint gaps do not exceed 0.5mm. A dual-layer sealing system is implemented at all joints: a 3mm-thick EPDM rubber strip (with a compression rate of 30%) is adhered to the inner side, while the outer side is secured using bolts and washers spaced no more than 300mm apart to prevent grout leakage. The connection between corner formwork and the main formwork utilizes an "L-shaped stiffener plus diagonal brace" structure, supplemented by angle steel reinforcements, to prevent formwork deformation or displacement during pouring. In this context, the use of magnetic chamfer strips is highly recommended. These strips are ideally suited for the edge molding requirements of precast concrete panels; leveraging their strong magnetic adhesion properties, they can be quickly and precisely secured to the formwork corners without the need for additional fastening via pneumatic nails or adhesives. This ensures convenient installation and precise positioning, effectively resolving issues of edge molding deviation caused by the instability and displacement often associated with traditional chamfer strips, while simultaneously eliminating the risks of adhesive contamination on the concrete edges or structural damage to the formwork caused by pneumatic nails. For release agents, a water-based polymer type with a solid content of ≥25% is selected. It should be applied evenly using a fine-nap roller, with an additional coat applied specifically to the corner areas. Application is strictly prohibited when the formwork is damp or exhibits surface rust, as this could contaminate the concrete edges or compromise the effectiveness of the release agent.

During the pouring and vibration stages, the sequence of "corners first, then the main body" must be strictly followed. A small-diameter chute is employed to ensure precise concrete placement; in the corner zones, the thickness of each concrete lift must not exceed 200mm to prevent the impact of falling concrete from damaging the formwork corners. A φ30mm high-frequency internal vibrator is utilized, with vibration points spaced no more than 300mm apart (this spacing is reduced to 200mm in the corner zones). The vibration technique involves "rapid insertion and slow withdrawal," with the insertion depth extending 50–100mm into the previously placed concrete layer. In the corner zones, the vibrator should be held in place for 20–25 seconds-until a layer of surface grout appears and no further air bubbles are observed rising to the surface-while strictly avoiding any contact between the vibrator and the formwork itself. For thin-walled corner components, attached vibrators may be utilized to assist in compaction, thereby preventing mortar loss caused by over-vibration or the formation of voids resulting from insufficient vibration.
During the curing phase, immediately after pouring is complete, cover the structure with moisture-retaining materials to prevent rapid moisture evaporation from the edges, which could lead to shrinkage cracks. The timing of formwork removal must be strictly controlled to ensure that the concrete has attained at least 75% of its designed strength. When removing the formwork, use specialized tools and begin the process at non-corner sections; apply gentle prying and slow, careful detachment to avoid damaging the corners through forceful prying. The post-removal curing period should last no less than 14 days, during which the concrete surface must be kept moist-with particular attention paid to the corners-to prevent drying cracks and surface dusting.
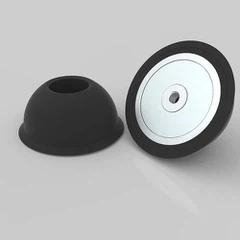
Using Magnetic Chamfers to Create Clean Edges

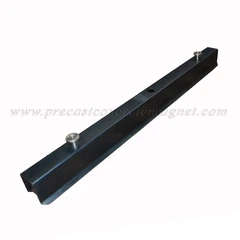
Magnetic chamfers are reusable edge-forming strips designed to create beveled edges on concrete elements. They help eliminate sharp corners and significantly reduce the risk of edge chipping during handling and transportation. This simple yet effective design not only improves operational efficiency but also enhances the overall quality of edge formation.
Magnetic chamfers are quick and easy to position, adjust, and remove. This flexibility allows operators to adapt to different panel designs without the need for additional tools, making the process more efficient and user-friendly.
Consistency of Edge Finishing
The strong magnetic adhesion ensures that the chamfer remains evenly aligned along the entire edge. This stability results in smooth, consistent edge finishes across multiple production cycles, improving both appearance and dimensional accuracy.
Applications in Various Precast Elements
Magnetic chamfers are widely used in the production of wall panels, slabs, beams, and columns. They are particularly suitable for projects that require high edge precision and repeatability, making them an essential component in modern precast concrete manufacturing.


Transport and Installation
During the transportation and installation of precast concrete slabs, their edges are susceptible to damage caused by impacts or shifting; therefore, enhanced protective measures and adherence to standardized operational procedures are essential. During transport, the edges should be wrapped in flexible materials, such as foam or rubber, and the slabs stacked in layers separated by spacers. These spacers must be positioned to avoid placing load-bearing pressure directly on the edges. Furthermore, stacking heights should be kept within reasonable limits, and the transport vehicle must be driven smoothly to prevent bumps or sudden braking that could lead to collisions. Prior to installation, the condition of the component edges must be inspected; minor defects should be repaired immediately, and it must be verified that the underlying base is level and that the pre-allocated installation slots align correctly. During hoisting, the slabs should be lowered into position slowly and carefully; the gaps between adjacent components must be controlled to within 5 mm and subsequently sealed. Following installation, the slabs must be promptly secured, and expansion joint plates installed in accordance with standard specifications to ensure both overall structural stability and the integrity of the edges.
Defect Repair
Should edge defects arise during the production, transportation, or installation processes, targeted remedial measures must be implemented promptly to prevent the defects from propagating. For minor chipping or corner damage, the affected area should be rinsed with clean water and thoroughly cleaned using a wire brush; after being sufficiently moistened, it should be patched and leveled using a 1:2 or 1:2.5 cement mortar mix. In cases of more severe damage, any unsound concrete and protruding aggregates must be chiseled away; after rinsing the area clean and moistening it, repairs should be executed using fine-aggregate concrete of a grade one level higher than the original concrete. Following the repair, enhanced curing measures must be applied to ensure a tight bond between the repaired section and the original structural component, as well as a flat and uniform surface appearance. For deviations in surface flatness, a grinder should be used to lightly abrade the surface and remove any protrusions, thereby ensuring the edges are level and meet the requirements for both installation and aesthetics.
Best Practices for Achieving Perfect Edges
Perfect edges in precast concrete are not achieved by chance; they are the result of consistent control and attention to detail throughout the production process. Small adjustments in preparation often lead to noticeable improvements in final product quality.
Maintaining clean and flat steel surfaces is the starting point. Any debris, rust, or unevenness can create gaps between the chamfer and the formwork, leading to irregular edges. A smooth contact surface ensures precise alignment and consistent results across multiple casts.
Using high-quality chamfer materials is equally important. Durable magnetic or rubber chamfers maintain their shape under pressure and repeated use, unlike low-grade materials that may deform or wear quickly. Reliable materials help achieve sharp, uniform edges with minimal rework.
Inspecting the formwork before casting helps identify potential issues early. Checking alignment, chamfer positioning, and contact surfaces reduces the risk of defects once concrete is poured.
Standardizing the production process ties everything together. When cleaning, positioning, and inspection steps follow a consistent routine, edge quality becomes predictable, repeatable, and easier to control at scale.
Conclusion
Achieving flawless edges on precast concrete slabs hinges upon meticulous execution spanning the entire process, from design, raw material selection, and production to transportation, installation, and defect remediation, all under comprehensive quality control. Each stage is inextricably linked: design establishes a robust foundation; raw materials guarantee structural strength; production ensures precise molding; transportation and installation prevent damage; and remediation rectifies any defects. Furthermore, the strategic use of specialized tools, such as magnetic chamfer strips, effectively mitigates various edge-related issues. This approach ensures that the edges of precast concrete slabs remain flat, sturdy, and durable, thereby safeguarding both structural integrity and installation precision, while simultaneously enhancing the overall quality and longevity of the entire engineering project.
FAQ
Q: What are the common edge defects in precast concrete panels, and what are the main causes?
A: Common defects include chipped edges, grout leakage, surface unevenness, poor joint alignment, and honeycombing. The main causes are unstable formwork fixing, improper vibration, incorrect material mix ratios, damage during transportation and installation, insufficient curing, and inaccurate positioning of traditional chamfer tools.
Q: What are the key advantages of magnetic chamfers compared to traditional chamfers?
A: The main advantages are that no nails or glue are required, and a strong magnetic force ensures precise positioning. This helps avoid concrete contamination and formwork damage. Magnetic chamfers are durable, reusable, and capable of maintaining a consistent edge radius, reducing edge chipping while improving efficiency. They are also suitable for irregular edges and thin-wall components.
Q: What is the acceptable tolerance for edge dimensions, and how can excessive deviation be prevented?
A: Dimensional tolerances for panel width and thickness should generally be controlled within ±3 mm, and surface flatness should not exceed 3 mm deviation when measured with a 2-meter straightedge. To prevent excessive deviation, standards should be defined during the design stage, precise and reinforced formwork should be used during production, concrete placement and vibration should be controlled evenly, and post-demolding inspection and correction should be carried out promptly.
Q: How can edge damage be minimized during transportation and installation?
A: During transportation, edges should be protected with soft materials such as foam or rubber pads. Components should be stacked in layers, avoiding load on the edges, and transported smoothly to minimize vibration. Before installation, edges should be inspected and defects repaired in advance. During lifting, components should be lowered slowly to avoid impact, and after installation, they should be fixed securely with proper joint alignment and sealing.
Q: How can minor edge chipping be repaired effectively?
A: First, clean the damaged area using water and a wire brush, and ensure it is properly moistened. Then apply a cement mortar mix with a ratio of 1:2 to 1:2.5 to fill and reshape the edge. After repair, maintain proper curing conditions to ensure strong bonding and a smooth surface finish.